|
|
JEM RESTYLINGFinishing Off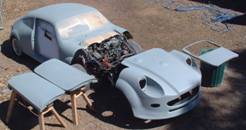
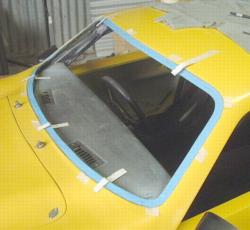
All the bits masked up and readied for priming and final colour coats. At this stage you get to see if all the planning has paid off. The flap in the masking over the door is so I could get my hand inside and steer it back into the shed!
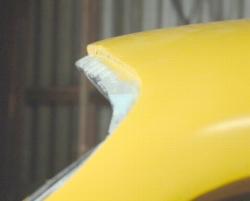
After the paint was dry the windscreen surround was cleaned and the black double-sided tape added to the new ledge. The screen was then trial positioned and guide marks added to pieces of masking tape around the perimeter. Then the screen was removed, the underside thoroughly cleaned, and the
blue cover strip removed from the tape.
The screen was then lowered onto temporary aluminium spacers and carefully lined up with guide marks on the masking tape. Having taken a deep breath the spacers were slowly withdrawn and the screen pressed down, leaving an equal gap all around the edge. This gap was filled with a 10mm "T" section rubber set in place with silicone sealant. The whole process was not all that difficult but does require careful
planning and checking. Don't be in a hurry.
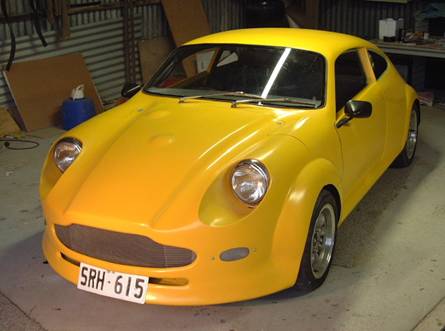
The radiator opening was filled with perforated stainless steel sheet, and the original front indicator lights set in new sheet aluminium boxes behind perspex covers. The flip-bonnet hinge was positioned so that when open the front face rests flat on the ground. At present I use a piece of carpet to keep it from being scratched when fully open. The bonnet is held down with two flush cam-lock fasteners at the upper corners, near the wiper arms. I once forgot to lock them and drove off. When I pulled up at the petrol station the sudden stop caused the bonnet to gently flip open - the attendant was very impressed! I am going to add a retractable seat belt to the fire-wall that limits the amount of bonnet travel and keeps it in place during heavy braking..... just in case I forget to lock it again - which could be very embarrassing! The headlights will be covered with perspex covers - possibly using similar flush fixing to the windscreen, with the light being removable from the underside.
Like many kit car rebuilds the job is really a "work in progress", with light covers, windows and a full interior redesign to go, but these will all take a lot of planning too. Now where is that sketch pad of mine again..........now lets see.......leather seats.......walnut dash.........hmmmmm? © 2004 Paul Mitchell, Adelaide, South Australia |
![]()
![]()
![]() Last updated Tuesday 8th March, 2013
Last updated Tuesday 8th March, 2013